
This time of year always brings back memories of quiet mornings, the pine scent, and the glow of a gift wrapped with care. I grew up watching gifts come alive with crisp paper, bright ribbons, and a small note tucked inside. Those moments stuck with me and showed how a simple wrap can spark delight before the present is even opened. With that in mind, I created this post to bring that same warmth to your gifts.
This post grew from a simple need: wrapping gifts should feel like a small celebration, not a chore. I pulled together 22 creative gift wrapping ideas that are easy to pull off, affordable, and ready to wow. They cover everything from cozy fabric wraps to playful tags and smart reuse.
If you love cozy moments and small, personal touches, this post is for you. If you want your gifts to stand out without a mountain of wrapping time, you’re in the right place.
Here are 22 wrapping ideas that cover paper, fabric, and clever extras. You’ll learn how to use cloth wraps, kraft paper with simple stamps, jar gift holders, and natural accents. Each idea includes the basic materials and easy steps so you can try it tonight. The goal is bold yet doable: a wrap that feels warm, stylish, and friendly to your budget.
These ideas work for any gift and any occasion. You can mix and match styles to fit your vibe. The wraps are built to be reusable, so you cut waste while keeping the magic. That means your presents look great and the planet stays happy.
Ready to try? Start with a favorite paper or fabric, then pick one of the wraps from the ideas above. Set up a quick station with scissors, tape, and a ribbon, and you are ready to go. As you wrap, notice how small touches, like a handwritten tag, a sprig of greenery, or a twist of twine, make a big impact. If you want, share a photo of your wrapped gifts in the comments to spark more ideas. Let’s make gift wrapping part of the joy this season.
1. Nature-Inspired Wrap

Want a wrap that feels earthy and stylish at the same time? Try a nature-inspired gift wrap. It uses simple items from outdoors to make your present look special.
Start with a sturdy base. Brown kraft paper gives a warm, rustic look and keeps things affordable. Use a glue stick to attach fresh or dried leaves along the edges. Let the leaves create a natural frame around your gift.
Add little natural accents. A sprig of rosemary, a small pinecone, or a slender twig can turn plain paper into a woodland scene. Arrange them so they peek from the edges. If you like texture, tuck a few extra leaves in the corners for depth.
Finish with simple string. Tie the wrap with twine or jute for a handcrafted feel. This not only looks good but also keeps things secure without heavy tape.
Practical tips to boost appeal. Choose colors that fit the season. Switch in green needles for winter and warm browns for fall. Use biodegradable materials whenever you can. This wrap works great for handmade gifts or items sourced from nature.
Here is why it works. It gives a gift that tells a story. It smells faintly of pine and herbs. And it shows you care about the planet.
Next steps. Gather kraft paper, leaves, a pinecone, rosemary, and string. Wrap, attach, and present.
1. Nature-Inspired Wrap
Editor’s Choice

Vanhench Brown Wrapping Paper, Craft Kraft Paper 17.5″x 1200″(100′) for …
 Amazon$6.99
PerkHomy Natural Jute Twine 600 Feet Long Twine String for Crafts Gift W…
Amazon$5.99
100 PCS Real Fall Dried Pressed Flowers Leaves Fall Natural Dried Flower…
Amazon$12.992. Fabric Wrap

Fed up with wasteful paper wrap? Fabric wrap gives style and can be used again. It also adds a personal touch you can feel.
– Fabric choice: Pick a scarf or sturdy cloth that matches the person and the gift.
– Size and fit: Choose fabric large enough to cover the item with room to tie a neat knot.
– Wrapping steps: Center the gift on the fabric, pull the sides up, twist, and tie a simple knot or small fabric bow.
– Personal touches: Add a small fabric tag with the name or a short note.
– Patterns that pop: Florals, polka dots, or stripes bring joy.
– Fabric with meaning: Using a family heirloom or a favorite color makes the gift feel special.
– Care and reuse: After opening, the wrap can become a scarf, handkerchief, or bag, keeping the memory alive.
– Practical tips: Iron the fabric for a crisp look, and fold it neatly when you store it.
– Storage: Store the fabric neatly in a drawer or box so it stays ready for the next gift.
– Best fabrics: Cotton, linen, and sturdy blends work well and help wraps hold their shape over time.
This kind wrap is eco-friendly, budget-friendly, and stylish. It shows you care about the moment and planet.
2. Fabric Wrap
Editor’s Choice

The Useless Brand Furoshiki Wrapping Cloth | Reusable Cotton Fabric Gift…
Amazon$19.99
Dress Scarves Shawl Wraps Long Silky Scarf for Women Dressy Fashion Ligh…
Amazon$14.99
SallyFashion 100pcs Gift Tags with String Attached, 2 x 4 inch Kraft Pap…
Amazon$5.993. Vintage Map Wrap

Here is why this wrap works. It turns a gift into a small trip before anyone opens it. The aged map adds texture and a hint of adventure you can feel.
Next steps to pull it off:
– Source old maps from thrift shops, flea markets, or charity stores.
– Cut the map to the size you need so it fits your present with a clean edge.
– Use double-sided tape for a neat, strong finish.
– Layer the map on your gift wrap. Add a thin ribbon or natural twine for color and touch.
– Tie on a compass charm or a travel tag for a tiny nod to exploration.
– Write a personal note on a separate card. Use a travel quote to echo the map theme.
For a cohesive look or a bigger wow, add related items:
– Wrap themed travel books or a small globe with the map to create a ready-made gift set.
– If the map is thin, back it with kraft paper for extra strength and a smoother finish.
– If maps are hard to find, print a vintage map on light paper and follow the same steps.
This wrapping style sparks curiosity and starts conversations at gatherings. It shows you put care into the tiny details.
Your guests will notice the map and ask where you found it.
3. Vintage Map Wrap
Editor’s Choice

EZlifego Double Sided Tape Heavy Duty, Nano Double Sided Adhesive Tape, …
Amazon$9.99
PerkHomy Natural Jute Twine 600 Feet Long Twine String for Crafts Gift W…
Amazon$5.99
Vintage Retro World Map Wrapping Paper, Antique Vintage Ancient Retro Wo…
Amazon$8.994. Edible Wrap Gifts
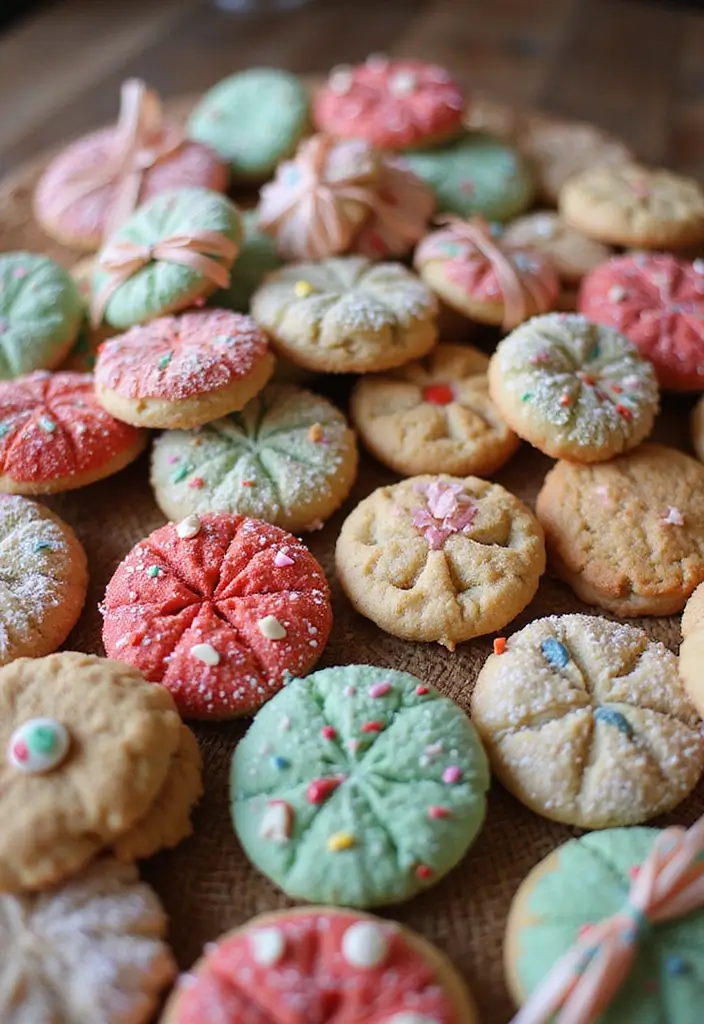
Want a gift that tastes as good as it looks? Edible wrap gifts turn a simple present into a tasty moment.
– What to wrap: cookies, gourmet chocolates, small jars of jam, or flavored popcorn. Keep the treats easy to eat and share.
– How to wrap: choose a food‑safe paper that mimics a candy wrapper. You can use printable designs found online or design your own with simple colors. Cut to fit and wrap the goodies snugly. A little crinkle sound when they unwrap adds to the fun.
– Finishing touch: tie with ribbon or string and add a small tag that lists what’s inside. A short note like “Peppermint cookies, enjoy!” makes the gift feel personal.
– Best moments: this idea shines for Christmas, birthdays, school events, or any time you want a sweet surprise.
– Quick tips:
– Make sure the paper is food safe so nothing leaks or tastes off.
– Match flavors to the season, such as peppermint for winter or citrus for spring.
– You can switch in jars of homemade jam or a bag of seasoned popcorn for variety.
Next steps: pick a treat, grab the right paper, and wrap with care. Your edible wrap gift will be both delicious and delightful to open.
4. Edible Wrap Gifts
Editor’s Choice

G.E.T. P-GT-1212-W 12″ x 12″ White Food Word Text Grease-Resistant Food-…
Amazon$59.84
VGOODALL 9 Rolls Jute Ribbons Lace Craft Ribbon 18 Meters for Crafts Wra…
Amazon$10.99
Avery Blank Printable Tags, Sure Feed Technology, 2″ x 3.5″, White, 96 C…
Amazon$14.315. Layered Textures
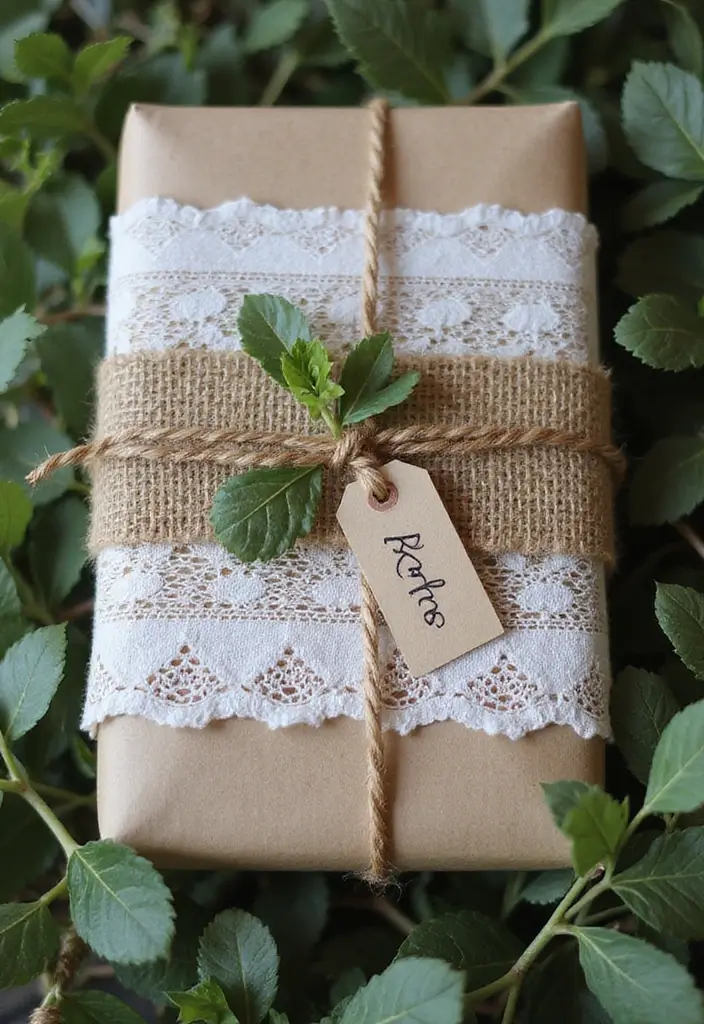
Layered textures makes a gift wrap stand out. If you want a wrap that invites a touch, this is your move.
Here is why: a solid base keeps the wrap neat. Then add texture on top. The eye sees depth, and your gift feels special before it’s opened.
Start with a calm base. Pick a color that fits the occasion. Light brown kraft paper works well for a warm look. Then layer in texture like lace, burlap, or tulle. Place the fabric pieces across the middle or at a corner for momentum in the design.
Example: wrap the gift in kraft paper. Add a lace strip across the center. Tie with twine. Clip on a small flower or a tiny sprig of greens to give an earthy note.
To nail this look:
– Mix different textures for more interest.
– Secure every layer so nothing slips.
– Try a wider lace strip for a bold focal point, or use narrow trim for a subtle touch.
– This style works well for weddings, anniversaries, or other special days.
Layered textures raise the first impression. It feels thoughtful and looks memorable even before the wrapping is torn. Your recipient will notice the care in every grip and crease.
5. Layered Textures
Editor’s Choice

Vanhench 36″x 2520″ (210′) Brown Kraft Paper Roll for Bulletin Board Pap…
Amazon$32.99
ilauke 46 Yards White Lace Ribbon 14 Rolls Vintage Lace Trims 0.6 to 2.1…
Amazon$12.50
PerkHomy Natural Jute Twine 600 Feet Long Twine String for Crafts Gift W…
Amazon$5.996. Personalized Photo Wrap

Want a wrap that makes the gift feel personal from the moment you hand it over? A personalized photo wrap does that by turning memories into the gift’s outer layer. Here is why it works: photos tell a story before the paper is opened.
How to craft a photo wrap
– Gather photos that remind you of the recipient or moments you’ve shared.
– Pick your look: print on wrapping paper for a full photo wrap, or paste photos on plain paper to collage.
– Add a personal touch with doodles or captions beside each image.
– Decide on color: black and white for a classy vibe, or full color for energy.
– Slip in a heartfelt message inside or on a card.
– Use good photo quality. Clear, high-resolution images look best on paper.
– Finish with neat edges. A clean seam makes it feel thoughtful.
– This works for birthdays, graduations, or big moments.
– It doubles as a keepsake; the recipient can save the photos.
– Next steps: pick a few photos, test print, and decide full wrap or collage.
– With a little planning, you create a wrap that stands out.
In short, this photo wrap adds meaning to a gift. Bring memories to the front and make the unwrap memorable.
6. Personalized Photo Wrap
Editor’s Choice

Glossy Photo Paper For Printer 8.5 x 11″ – (100 Sheets) – Works with Ink…
Amazon$12.99
Mr. Pen Craft Scissors – Decorative Edge, 6 Pack, Zig Zag, Scrapbooking,…
Amazon$6.847. Upcycled Material Wrapping

Want wrap that pops and helps the planet at the same time? Upcycled material wrapping does just that. It uses items you already have and adds a personal touch to your gifts.
Here is how to do it.
– Base materials:
– Brown paper bags
– Fabric scraps
– Old newspapers
– Maps or calendar pages
– Prep:
– Clean and flatten the material
– Cut it to fit the gift
– Color and design:
– Paint old newspaper with watercolors for a soft look
– Draw simple shapes with markers for bold interest
– Finish:
– Tie with string from old fabric or a ribbon you already own
– Add natural touches like dried flowers or cinnamon sticks
– Smart tips:
– Use colors that catch the eye
– Match the wrap to the gift theme
– Keep folds neat for a tidy finish
– Layer textures with fabric scraps for depth
Here is why it works: it cuts waste and makes your gifts feel personal. It also lets you get creative without spending much.
Next steps: gather what you have, pick a base, and start wrapping. Your wrapped gift will look unique and kind to the earth.
7. Upcycled Material Wrapping
Editor’s Choice

Eco Kraft Wrapping Paper Roll (Jumbo) | Biodegradable Recycled Material …
Amazon$23.99
PerkHomy Natural Jute Twine 600 Feet Long Twine String for Crafts Gift W…
Amazon$5.99
Watercolor Paint, 48 Colors Washable Watercolor Paint Set with a Brush a…
Amazon$7.998. Themed Wraps for Hobbies
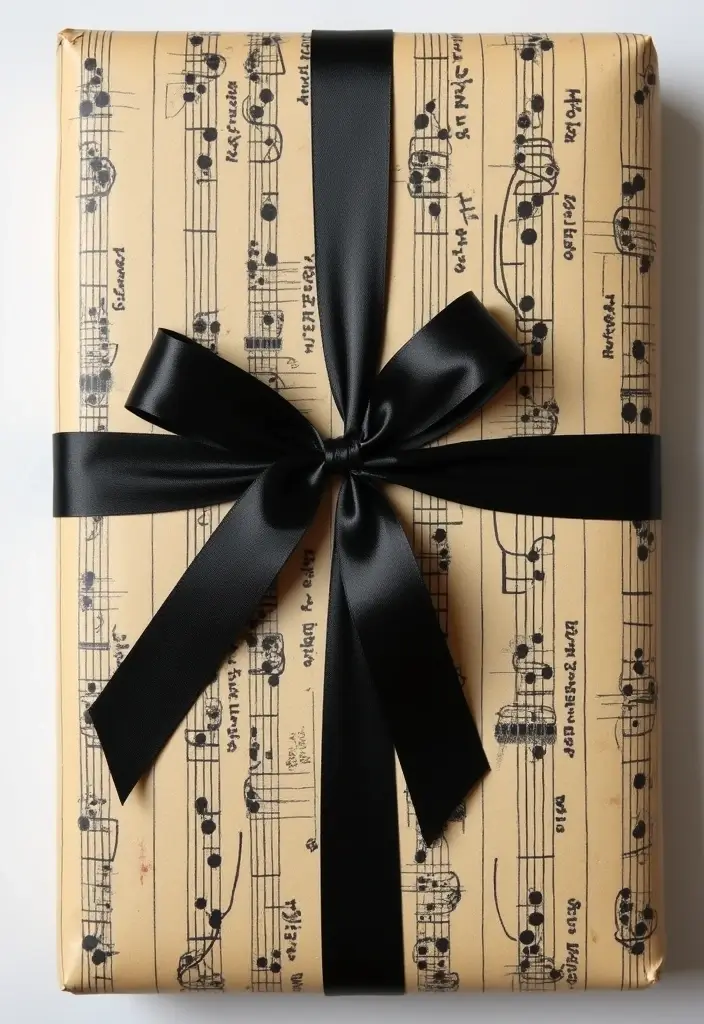
Are you trying to make a gift feel personal without a big cost? Themed wraps do that by echoing the recipient’s hobbies.
Here is why this works. It shows you listen, and it adds a little story to the unwrap.
Let’s break it down with practical steps you can start today.
– Step 1: Identify a hobby and choose wrap that matches. For a musician, use sheet music pages as the base; for a comic fan, thin graphic pages work as a decorative layer.
– Step 2: Layer with a solid color to balance. A plain ribbon and a simple wrap help the theme stand out.
– Step 3: Add a tiny hobby accent. A guitar pick tied into the bow, a seed packet tucked under the knot, or a brush tucked near the edge adds a personal touch.
– Step 4: Finish with a small tag that ties back to the hobby. A short note like “For your next gig” or “Keep growing” makes the wrap feel complete.
– Step 5: Try ideas for common hobbies. Gardening with floral paper, art with paint-splatter wrap, sports with team colors or a logo sticker.
Finish with care. A neat fold, a tidy bow, and a touch of texture make the gift feel crafted. The result is a wrap that sparks curiosity and shows you care.
8. Themed Wraps for Hobbies
Editor’s Choice

Ouzrpuo Wrapping Paper 20pcs Christmas Vintage Gift Wrapping Paper 20.5 …
AmazonGBP 9.66
WRAPAHOLIC Kraft Floral Wrapping Paper Roll – Mini Roll – 17 Inch x 9.8 …
Amazon$6.99
MEEDEE Rainbow Ribbon Solid Color Assortment 10 Colors Double Face Satin…
Amazon$7.999. Bold Color Blocking

Bold color blocking is a quick way to make a gift stand out. You use two or three bold colors that look good together. Then you wrap the present in sections, not a single sheet. For example, wrap half the box in bright blue and the other half in sunny yellow. The result feels modern and fits birthdays or parties.
Get a base that helps the colors pop. Solid paper or fabric makes the lines clean. Add finishing touches with washi tape, a ribbon, or string in a contrasting shade. The tape stands out but stays neat.
Here is how to make it work:
– Pick colors that suit the recipient. Think playful for kids, classy for adults.
– Use solid colors for a crisp look.
– Wrap one color section, then the next, along a straight seam.
– Add texture with matte paper, a glossy stripe, or a fabric panel.
– Finish with a simple bow or a slim ribbon that echoes a color.
Why try color blocking? It gives your gift a clean studio feel and makes the wrap stand out. It is quick, simple, and fun. Next steps: grab two or three colors, pick a base, and try the block wrap.
9. Bold Color Blocking
Editor’s Choice

Jillson Roberts 6 Roll-Count All-Occasion Solid Color Gift Wrap Availabl…
Amazon$39.95
50 Rolls Washi Tape Set, Decorative Adhesive Tape for Scrapbook, Arts & …
Amazon$9.99
MEEDEE Rainbow Ribbon Solid Color Assortment 10 Colors Double Face Satin…
Amazon$7.99You might also like


10. Holiday-Themed Collage Wrap

Holiday Collage Wrap that Pops
You want a wrap that stands out. A holiday themed collage wrap does that by mixing images, scraps, and festive colors. It feels personal and fun.
What you need
– a solid base paper
– holiday images (snowflakes, ornaments, cards)
– magazine cutouts and scrapbooking pieces
– glue or tape
– scissors
– small embellishments like holly or pinecones
– a thin ribbon or twine
How to make it
– Start with the solid background.
– Cut out shapes from your scraps.
– Lay your pieces on the base to plan the look.
– Glue or tape them in place, adding layers for depth.
– Add textures with a ribbon or a natural accent.
– Seal the edges so pieces stay put.
Tips to nail the look
– Choose a color scheme for the holiday (red/green for Christmas, blue/gold for Hanukkah, pastels for Easter).
– Layer papers to add dimension.
– Personalize by adding a recipe, message, or photo on a cutout.
– Leave some breathing room so the collage reads clearly.
– If the wrap seems crowded, switch to a larger base sheet.
Finish and wrap
– Tie a simple bow and tuck in a sprig for charm.
– This wrap creates a visual story and makes your gift feel thoughtful.
10. Holiday-Themed Collage Wrap
Editor’s Choice

RUSPEPA Off White Matte Wrapping Paper – Solid Color Pearly – Lustre Pap…
Amazon$8.45
445 PCS Vintage Scrapbook Paper Journaling Scrapbooking Supplies Kit Aes…
Amazon$12.99
Ribbli Satin Ribbon 1/8 inch x Continuous 100 Yards, Thin Red Ribbon Dou…
Amazon$8.9911. DIY Stamped Wrap
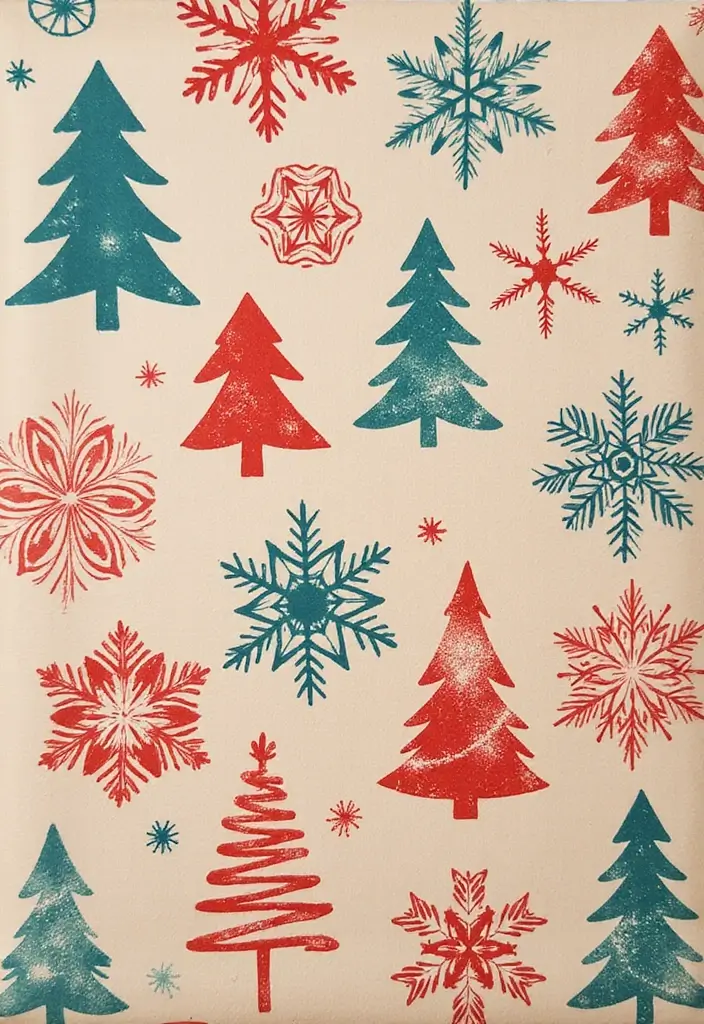
DIY Stamped Wrap is a gift that feels special without a big budget. You can add a personal touch by stamping your own paper.
Next steps will help you start quickly.
What you need
– Choose kraft paper or plain wrap.
– Pick stamps you buy or make at home.
– Gather ink pads or water-based acrylic paint.
– Have brushes or sponges ready.
– Make simple stamps with potatoes, erasers, or craft foam.
How to make stamps
– Carve a simple design on your chosen material.
– Dip the stamp in paint or press it on an ink pad.
– Stamp on scrap paper first to test how it looks.
Stamp ideas
– Holiday motifs work well for festive gifts.
– Create a tiny scene that tells a story about the present.
– Use symbols that match the recipient or occasion.
Smart stamping tips
– Do a quick test on scrap wrap before you stamp.
– Use thin paint or a light ink for crisp lines.
– Let each color dry fully before moving to the next step.
– Stamp with steady hands and space the designs evenly.
Finish the wrap
– Wrap the gift as usual, then add a ribbon and a tag.
– You can add a metallic edge by tracing a line along one border.
Care and time
– Wash stamps with mild soap after use and air dry.
– This project saves money and adds a personal touch.
DIY stamped wrap is more than just gift wrapping ideas; it’s a heartfelt way to show you care! Add your personal touch and watch your presents steal the show without breaking the bank.
11. DIY Stamped Wrap
Editor’s Choice

PerkHomy Brown Kraft Paper Roll 36″ x 1,800″ (150′) for Gift Wrapping Bo…
Amazon$29.99
HRJZF 30PCS Rubber Block Stamp Carving Blocks with Cutter Tools and Rubb…
Amazon$27.95
ARTEZA Craft Acrylic Paint Set, Water-Based Acrylic Craft Paint, Matte F…
AmazonCheck Price12. The Classic Bow Upgrade

Is your gift wrap feeling plain? A wow-worthy bow can turn a good present into a memory.
Here is why: a unique bow catches the eye and sets the tone before the gift is opened. Build it with style using simple, available materials.
– Fabric strips, old ties, or leather pieces for a rugged look.
– Layer two or three colors or textures to add depth.
– Try a fabric flower instead of a traditional bow. Cut fabric into petal shapes, gather the edges, and glue or stitch into a bloom.
To make sure your bow shines, follow these tips:
– Use contrasting colors to make the bow pop.
– Don’t be afraid to go oversized; bigger bows feel dramatic.
– Match the bow to the overall gift theme, from playful to chic.
This approach works on many gifts. For a DIY weekend, prep a few bows at once: cut strips, create flowers, and stash glue and pins for quick assembly.
Next steps: try a few options on scrap paper. Then attach your bow with a clean knot or hot glue for a secure hold. Finished bows can become a styling detail that friends notice and remember.
12. The Classic Bow Upgrade
Editor’s Choice

Vitalizart 1″ x 27 Yd Chiffon Silk Ribbon Mixed Color Ribbons Set 3 Yd x…
Amazon$9.99
Surebonder Cordless Hot Glue Gun, High Temperature, Full Size, 60W, 50% …
Amazon$19.12
3-Pack 8″ Heavy Duty Scissors with Ultra Sharp Blades and Comfort Grip H…
Amazon$9.9913. Minimalist Chic

Here is why minimalist chic works for gift wrapping. You want a look that feels refined without shouting. This style relies on clean lines, quiet color, and careful details.
– Steps to nail the look:
– Step 1: Pick a single color. White or a soft pastel keeps the look calm and timeless.
– Step 2: Wrap the gift with neat folds. Aim for straight edges and crisp corners.
– Step 3: Add a small accent. A single twine or a slim ribbon does the job. Attach a single flower or a tiny sprig of greenery for subtle life.
– Step 4: Choose quality materials. Linen, heavy paper, or uncoated kraft add texture that you can feel.
– Step 5: Finish with a note. A short handwritten card makes it personal.
This approach shines at weddings, baby showers, or any dressy occasion. It also works well for corporate gifts and seasonal moments when you want year after year consistency.
Here are tips to nail the look:
– Keep colors muted for a classic vibe.
– Use sturdy materials to keep the wrap crisp.
– Focus on neat folds and tidy corners.
– Add a small, legible card to tie the theme together.
Next steps: pick a gift, choose a color, and practice a clean wrap. You’ll see how less can really be more. Give it a try.
13. Minimalist Chic
Editor’s Choice

Gorillas Cotton And Linen Gift Wrap Bags 8 Pcs Drawstring Bag Jewelry Po…
Amazon$19.99
PerkHomy Natural Jute Twine 600 Feet Long Twine String for Crafts Gift W…
AmazonEUR 5.10
IDL Packaging Brown Kraft Paper Roll 36″ x 2160″ (180 feet), 30lb Thickn…
Amazon$40.2014. Creative Use of Ribbons

You want gift wrap that wows, but you don’t want to spend hours on it. Ribbons can do more than a simple bow. They add color, texture, and a personal touch you can feel.
Here is why ribbons matter. A few smart choices push a plain box into the wow zone. You can mix patterns, mix textures, and still keep the wrap clean and neat.
Creative ribbon tricks
– Layer different ribbons for texture. Pick a thin satin and a wider grosgrain and let them cross on the top.
– Use metallic ribbons for a touch of glam. A hint of gold or silver catches the light as you move the gift.
– Choose wired ribbons to shape them into stars, loops, or gentle waves. They hold their form.
– Fan ribbons from the top to create a starburst effect. It feels special without extra ribbons or wrapping.
– Mix velvet or satin ribbons for a luxe look. The soft feel adds depth.
– Vary widths and colors to keep the wrap lively. A narrow tail beside a wide stripe makes it interesting.
Next steps. Here’s a quick, simple method:
– Pick two ribbons that match or contrast with the wrap.
– Cut tails long enough to drape nicely, about 6 to 8 inches.
– Place a base ribbon around the box, then cross it in the back and secure with a small tape dot.
– Add a finishing touch like a starburst or a second small bow with a third ribbon.
With a few easy moves, you turn a plain gift into a present that feels thoughtful and styled.
14. Creative Use of Ribbons
Editor’s Choice
MEEDEE Rainbow Ribbon Solid Color Assortment 10 Colors Double Face Satin…
Amazon$7.99
Burlap Wired Ribbon 8 Rolls – Natural 1-1/2 Inch 40 Yards Solid Fabric E…
Amazon$15.99
BEISHIDA 500 Yards Silver Ribbon Curling Crimped, Balloon String Shiny M…
Amazon$6.8915. Washi Tape Wonders

You want gift wrap that pops without hours of work. Washi tape makes that easy. It adds color and texture, and you can change the look in minutes. Here is why it works: tape sticks well, peels cleanly, and fits many giftwrap styles.
– Seasonal bursts Use red and green tapes, gold foil, or pastels to add a festive touch. Apply in bands or a single stripe for quick pop.
– Shape it Create simple shapes with overlapping strips. A star, a heart, or a border turns plain paper into a design.
– Attach tags Tape can hold gift tags or tiny charms. A little color helps the tag stand out.
– Mix and match Try two patterns together or keep to one design for a clean look. This is easy to customize.
– Seal with style Use washi to seal the package instead of regular tape. It feels more deliberate and fun.
– Kid-friendly options Bold, bright patterns work well for kids. Let little helpers add strips for a playful wrap.
– Tips and care Store rolls in a sleeve so colors stay bright. Test on scrap paper first to avoid sticky surprises.
Next steps: gather a few rolls, wrap a gift, and see how it changes the look.
Washi tape isn’t just for crafting; it’s your secret weapon for stunning gift wrapping! In just minutes, you can transform ordinary presents into vibrant works of art that steal the show.
15. Washi Tape Wonders
Editor’s Choice
Mr. Pen- Washi Tape Set, 21 Rolls, Greenery Summer Design, Decorative Ta…
Amazon$7.99
SallyFashion 100pcs Gift Tags with String Attached, 1.7 x 2.8 inch Kraft…
Amazon$4.9916. Seasonal Inspired Patterns

Seasonal Inspired Patterns
You want gift wrap that fits the time of year. This approach makes your presents feel special and timely.
Choose paper that shows the season. Spring calls for soft florals and fresh greens. Fall looks best with warm browns, oranges, and leaf motifs. Winter wrap shines with snowflakes, metallics, and cool blues. Summer patterns can be bright, sunny, and beachy. Pick a pattern that communicates the season at a glance.
Practical tips to pull it off:
– Pair seasonal paper with ribbons or twine in a matching shade.
– Add a tiny seasonal touch, like a pinecone in winter or a pressed flower in spring.
– Try fabric wrap or reusable cloth with seasonal prints for a greener option.
– Mix textures for depth, such as matte kraft paper with a shiny ribbon.
Make it personal:
– If you know the recipient’s favorite season, tailor the wrap to that vibe.
– Keep the message clear on the tag so the theme stays obvious.
How to apply quickly:
– Start by choosing the paper.
– Then pick a ribbon that matches.
– Add a small seasonal accent.
– Finish with a simple handwritten tag.
Seasonal wrapping brings a little mood to your gifts and helps your present feel thoughtful.
Feel free to mix two seasonal looks on one gift. A spring flower paired with winter snowflakes can feel playful yet thoughtful. If you are unsure, start with one season and add a small accent from another for contrast.
Wrap your gifts in the spirit of the season! Whether it’s florals for spring or cozy motifs for winter, seasonal inspired patterns make your presents truly unforgettable.
16. Seasonal Inspired Patterns
Editor’s Choice

LaRibbons Reversible Christmas Wrapping Paper Mini Roll, Plaid and Solid…
Amazon$13.99
30 Roll 15 Colors Curling Ribbons for Crafts Bows Present Wrapping Flori…
Amazon$5.79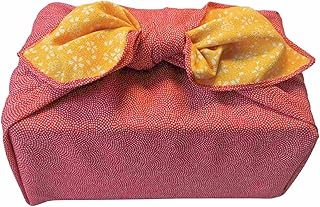
Furoshiki Japanese Wrapping Cloth Eco Gift Wrap Paper Reversible Cherry …
Amazon$8.99You Might Also Like


17. Craft Paper Origami

You want gift wrap that catches the eye and feels special. Craft paper origami adds depth and a touch of play. It shows you care and gives your present its own moment of wow.
What you’ll need
– Craft paper or colored origami paper
– Scissors and clear tape
– A little patience to practice folds
– A soft surface to work on
Shapes to try
– Flowers that bloom from a square of paper
– Cranes for a simple, graceful look
– Small hearts for warm, personal gifts
Play with color pairs and add tiny details like a dot in the center of a flower for extra charm.
How to pull it off
1) Wrap the gift in solid paper first for a clean base. The edges stay crisp and neat.
2) Practice a few folds on scrap paper before you touch the real sheets. Simple shapes are your best friends.
3) Make two or three origami pieces. Keep folds sharp and flat so they lie flush against the wrapping.
4) Attach the origami with a tiny piece of tape. Place it off-center for a modern touch.
5) Slip a tiny note or message inside the origami shape for a small, sweet surprise.
6) Save a few folded pieces for future gifts so your next wrap goes even faster.
Craft paper origami brings a playful twist to gift wrapping. It makes your present feel crafted by hand and ready to wow. The crisp texture of craft paper and bright colors catch light as you move the package.
17. Craft Paper Origami
Editor’s Choice

Scrapbook Paper 12×12, Double-Sided Suede Textured Craft Paper Set 24 Sh…
Amazon$13.99
Fiskars All Purpose Scissors, High Performance Cutting, Stainless Steel …
Amazon$6.48
Scotch Magic Tape with Scotch Desktop Dispenser, 6 Rolls of 3/4″ x 1000″…
Amazon$13.1918. Pom-Pom Wraps

Pom-Pom Wraps
You want a wrap that catches the eye without a lot of work. Pom-poms can do that. They give a gift a soft, playful look.
Here is how to make it happen.
– Choose a bright base wrap. A bold color or pattern gives your pom-poms a lively stage.
– Pick your pom-poms. You can make yarn pom-poms at home or buy ready-made ones. Pick colors that fit your paper.
– Attach them with care. Use clear glue dots or a small dab of craft glue. Place one or two at first, then build a cluster.
– Vary the sizes. Mix big and small pom-poms for texture and depth.
– Coordinate colors. Tie the colors to the paper or create a contrast that pops.
– Think about placement. Run a line along the edge, create a small cluster in the corner, or scatter a few across the surface.
– Let it dry. Give glue a little time before moving the gift.
This style adds texture and charm. It works well for birthdays, kid gifts, or any present that needs a soft, inviting look.
Next steps: gather supplies, try a sample wrap, and adjust color choices until you love the result.
Keep a few extra pom-poms on hand for quick last minute wraps.
18. Pom-Pom Wraps
Editor’s Choice

Clover Set Pom Maker, Multiple 4 Count, 8.63 x 5 x 1.38
Amazon$14.49![Caydo [400 pcs] - 300 Pieces 1 Inch Assorted Pompoms with 100pieces Wigg...](https://m.media-amazon.com/images/I/81402wBmjxL._AC_UL320_.jpg)
Caydo [400 pcs] – 300 Pieces 1 Inch Assorted Pompoms with 100pieces Wigg…
Amazon$9.99
Permanent Adhesive Dots, Double-Sided, Clear, 0.5″ Diameter, 150 Pieces …
Amazon$5.4719. Artful Wrap with Paint Dabs
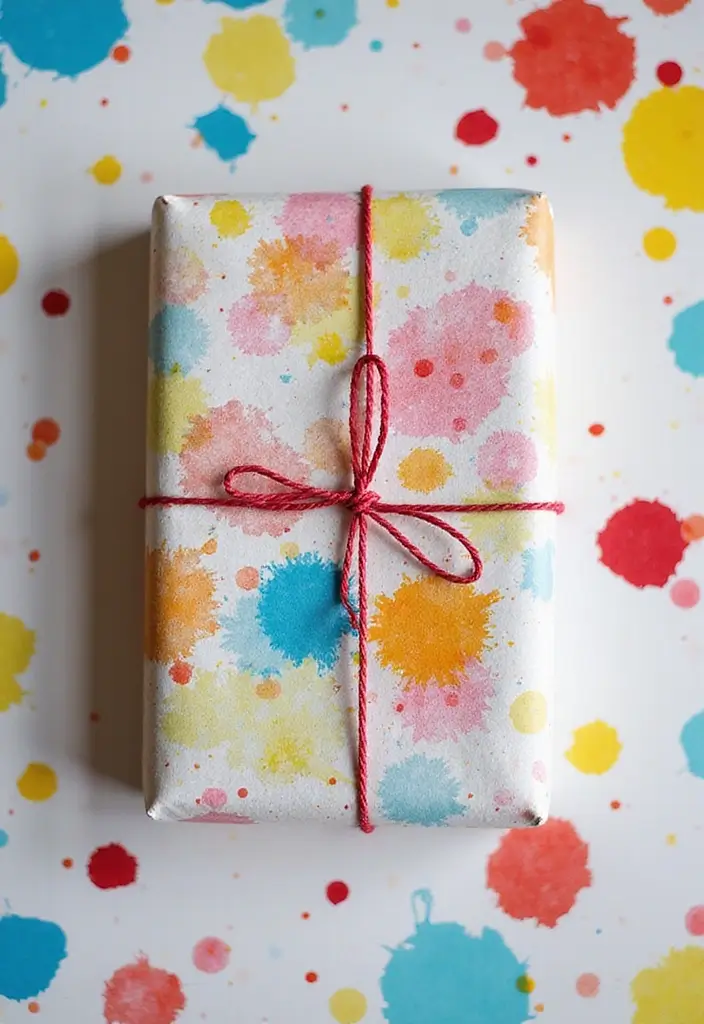
Artful Wrap with Paint Dabs
You want wrap that stands out without a lot of work. Paint dabs turn plain paper into a tiny canvas. Use non-toxic paint and keep the dab light. Kids can help, and the result feels personal.
– Choose plain wrap paper in a light color so colors pop.
– Pick two colors that fit the occasion or the recipient.
Here is how to do it. Lay the paper flat on a clean surface. Put a small dab of paint on a plate. Dip a sponge brush or a cotton swab into the paint. Gently dab onto the paper to make splashes or tiny shapes. Layer colors for depth. Let the paper dry completely before you wrap to avoid smudges.
This wrap works well with other wraps for a mixed look. Try:
– A soft sponge-dab for a speckled effect
– Abstract patterns for a modern touch
– Glitter paint for a little sparkle
Tips to keep it simple: use stencils for neat shapes, or freehand for a personal touch. Set up a quick station with paper towels so hands stay clean. After the paper dries, wrap your gift and finish with a plain bow.
Why it helps: the wrap adds care and makes the gift feel special before anyone even opens it.
19. Artful Wrap with Paint Dabs
Editor’s Choice

55PCS Acrylic Paint Set of 36 Colors 2fl oz 60ml Bottles 12 Brushes,Non …
Amazon$23.74
24 Pcs Foam Paint Brushes, Wood Handle Sponge Brushes for Painting, Stai…
Amazon$6.99
Vanhench Brown Wrapping Paper, Craft Kraft Paper 17.5″x 1200″(100′) for …
Amazon$6.9920. Layered Gift Boxes

Layered Gift Boxes: A Playful Unwrap
If you want a gift that feels special, layered boxes are your answer. They add a curious trail to the unwrap. Here is why this idea works: the surprise grows with each lid you lift, and the soft rustle of tissue makes the moment feel deliberate.
Let’s break it down
– Start with three boxes that fit inside one another. Mix shapes: square, tall, round. The stack looks inviting.
– Put your gift in the smallest box. Wrap that box, then place it in a second box. Finally, tuck the second inside a third. Add a thin layer of tissue between each box so it shifts with a whisper when you move it.
– Wrap each layer in a different style. One might be a bright solid color, the next a striped print, the last a natural texture like kraft or linen.
– Mark the order. Put a tiny sticker or tag on each outer box that says Open 1, Open 2, Open 3 so they know which layer to start with.
Extra tips
– Use a ribbon that ties all layers together. A bow on the outer box helps pull the eye.
– Slip a short note in the final layer for a personal touch.
– This method works for many gifts. Try it with several small surprises or one big treat inside.
Layered gift boxes turn a simple present into a small story you can share with joy. They raise anticipation without adding clutter.
20. Layered Gift Boxes
Editor’s Choice

Bright Creations Nesting Boxes – 6-Pack Brown Squares With Lids, 12 x 12…
Amazon$28.48
TINYFUTURE 100 Sheets Flower Gift Wrapping Tissue Paper Recyclable Green…
Amazon$9.99
LIUYAXI 20 Colors 100 Yard Satin Ribbon Rolls, 2/5″ Wide 5 Yard/Roll, Ra…
Amazon$7.9921. Clear Cellophane Wrap
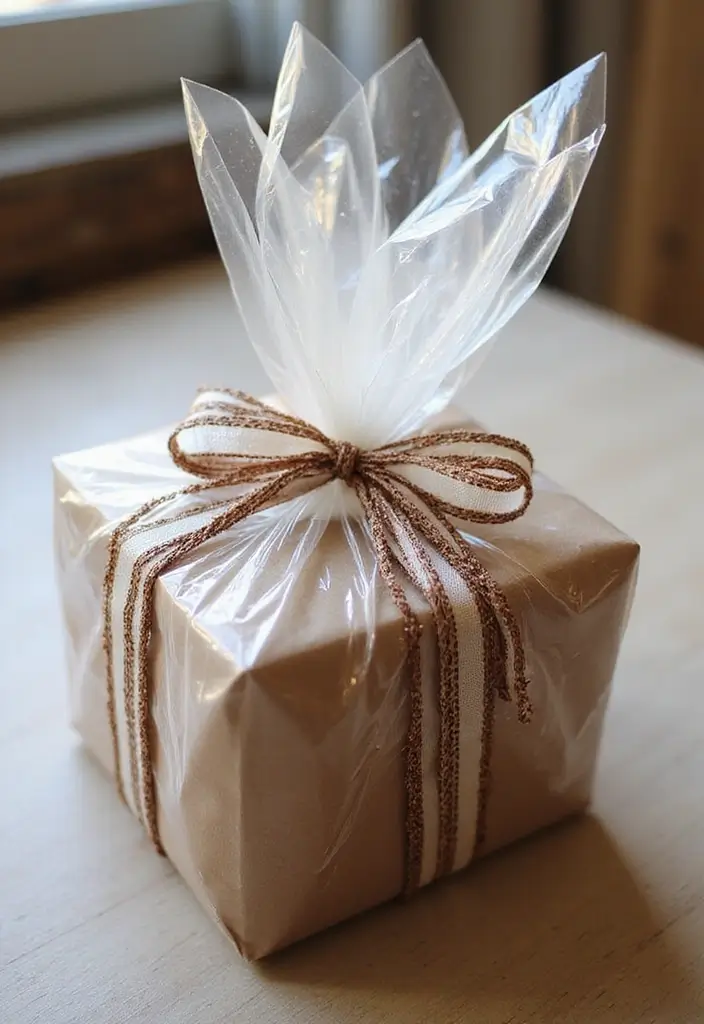
Why clear cellophane works
Want a wrap that lets your gift shine? Clear cellophane makes a clean, classy presentation. It protects the item and shows off its shape and color.
Here is why this style helps your gift stand out. It looks neat, goes with many gifts, and stays tidy on the way to the receiver.
How to wrap
– Step 1: Place the gift in the center of a large sheet of clear cellophane.
– Step 2: Lift the sides, gather at the top, then twist and secure with a ribbon or bow.
– Step 3: Add small touches inside the wrap, such as tiny flowers, a sprinkle of glitter, or a miniature ornament.
– Step 4: For more flair, use patterned cellophane or pair a bright ribbon with the clear wrap.
– Step 5: Seal the wrap tightly so the item won’t shift during transport.
Extra tips to level up
– For tall gifts, choose a longer sheet to create a clean base.
– If the item is fragile, place a layer of tissue inside before the cellophane.
– Finish with a matching tag to tell the story of your gift and add a personal touch.
Clear cellophane wraps present the gift with space for your ribbon and card, letting the gift do the talking.
Clear cellophane wrap is like a spotlight for your gift, letting its beauty shine through while keeping it safe. Elevate your presentation and make every present a showstopper!
21. Clear Cellophane Wrap
Editor’s Choice

100 ft Clear Cellophane Wrap Roll (31.5 in x 100 ft) – 3 Mil Thicken Cel…
Amazon$15.98
VGOODALL 9 Rolls Jute Ribbons Lace Craft Ribbon 18 Meters for Crafts Wra…
Amazon$10.99
Jansun 90PCS Christmas Mini Balls Ornaments Multicolour Imitation Pearl …
Amazon$9.5922. Gift Wrap Subscription Boxes

Stressed about wrapping every gift? Gift wrap subscription boxes can take that burden away. These services ship a monthly bundle of wrapping papers, ribbons, stickers, and tags, plus little extras to spark your creativity. They often switch themes with the seasons so your gifts look fresh all year.
You can choose a box that fits your style or the recipient’s interests. Some boxes include DIY kits for personal touches that show you care. And you can find boxes that focus on eco-friendly materials, so your wrapping is kind to the planet.
Smart picks to look for
– Look for subscriptions that use recyclable or plant-based papers and cords.
– Many services let you skip a delivery or tailor what arrives based on your schedule.
– This choice works well for frequent gift-givers who host many parties.
Next steps: pick a box, set your delivery cadence, and start saving time on wrapping. With a wrap box on hand, you stay ready for any occasion and give gifts that look thoughtfully wrapped.
Storage helps. Keep the box in a cabinet or closet so you can grab it fast when a gift appears. You can reuse ribbons and tags to cut waste. It makes party gifts less stressful.
22. Gift Wrap Subscription Boxes
Editor’s Choice

Hallmark 10″ Large Gift Boxes with Wrap Bands (2-Pack: Silver and White,…
AmazonCheck Price
WRAPAHOLIC Kraft Floral Wrapping Paper Roll – Mini Roll – 17 Inch x 9.8 …
Amazon$6.99
Scotch Gift Wrap Tape Kit, Wrapping/Art Supplies Set with Gift-Wrap and …
Amazon$13.08Conclusion
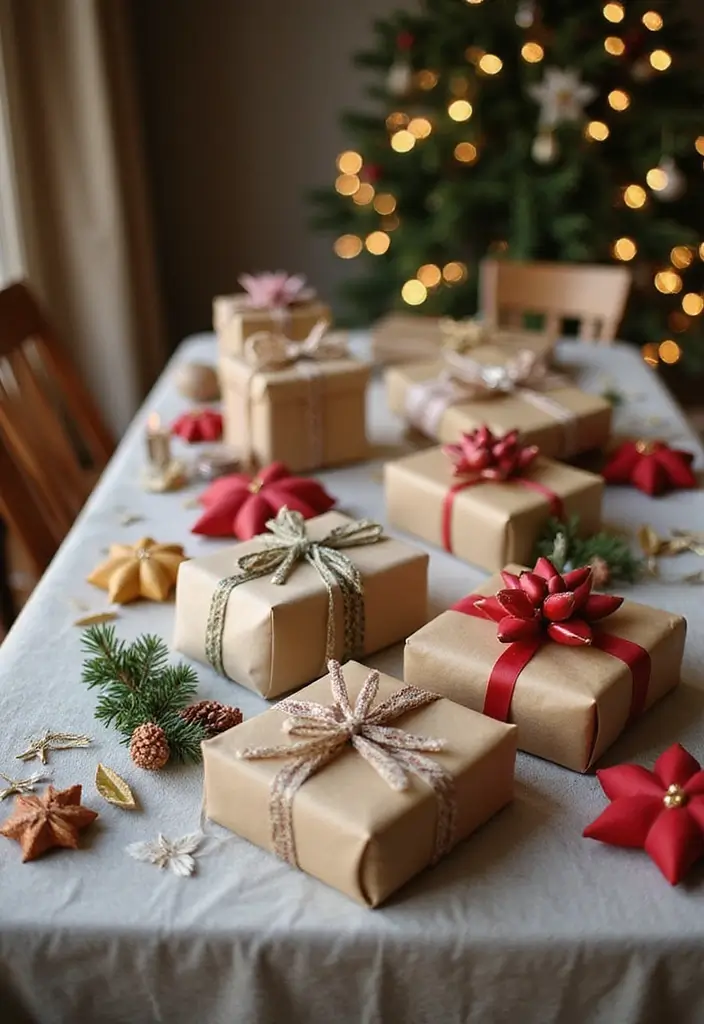
Wrapping gifts should be just as joyful as giving them. By exploring these creative gift wrapping ideas, you can turn every present into a stunning piece of art.
It’s all about personal touches and thoughtful details that truly elevate the experience. So whether you decide to go minimalistic or extravagant, remember that the effort you put into wrapping will surely be appreciated. Happy wrapping!
Note: We aim to provide accurate product links, but some may occasionally expire or become unavailable. If this happens, please search directly on Amazon for the product or a suitable alternative.
This post contains Amazon affiliate links, meaning I may earn a small commission if you purchase through my links, at no extra cost to you.
Frequently Asked Questions
What Are Some Unique Gift Wrapping Ideas for the Holidays?
If you’re looking to make your gifts stand out this holiday season, consider trying a nature-inspired wrap using elements like pinecones and twigs, or go for a vintage map wrap that adds a sense of adventure. Other creative options include edible wrap gifts like cookies wrapped in decorative paper or a personalized photo wrap that showcases cherished memories. Each of these ideas can transform your presents into stunning pieces of art!
How Can I Wrap Gifts Without Using Traditional Wrapping Paper?
Absolutely! There are numerous eco-friendly alternatives to traditional wrapping paper. You can use fabric wraps like scarves or reusable cloths, or even upcycled materials such as newspapers or old maps. Washi tape can add a pop of color too! Not only do these options reduce waste, but they also add a unique and personal touch to your gifts, making them even more special.
What Are Some Quick and Easy Gift Wrapping Techniques?
For a fast and stunning wrap, try bold color blocking by using two or three vibrant colors to create a striking visual effect. Alternatively, layered textures can add depth without requiring much effort—simply layer different materials like craft paper and ribbons. Pom-pom wraps can also be a playful touch that’s quick to assemble. These techniques will elevate your gift presentation in no time!
How Can I Make My Gift Wrapping More Personal?
Making your gift wrapping personal is all about the details! Consider using a themed wrap that reflects the recipient’s hobbies or interests, or create a DIY stamped wrap where you add your designs. You could also integrate personalized photo wraps that feature your favorite memories together. These touches show that you’ve put thought into not just the gift itself, but how it’s presented!
Are There Any Gift Wrapping Subscription Services Worth Trying?
Yes! If you find wrapping gifts to be a chore, consider a gift wrap subscription box. These services deliver a curated selection of wrapping papers, ribbons, stickers, and tags right to your door each month. It’s a convenient way to keep your gift wrapping fresh and exciting without the hassle of shopping for supplies. Plus, you’ll always be ready for any occasion with unique and creative materials at your fingertips!
Related Topics
creative gift wrapping
unique wrapping techniques
seasonal gift wrap
DIY gift ideas
earthy wrapping
minimalist wrapping
personalized gifts
quick wrapping tips
upcycled materials
holiday crafts
edible gift wrap
vintage style


