
18 Trendy Nail Designs You Can Do at Home (Your Friends Will Be Jealous of #7!)
Are you ready to transform your nails into a stunning work of art? Nail designs have become a fun and fashionable way to express yourself, and with so many trendy styles out there, it’s hard not to get excited! Whether you’re looking for an elegant look or a bold statement, creating beautiful nail art at home can be incredibly satisfying. I put this post together to show you how easy it can be to achieve salon-worthy nails without breaking the bank.
If you’re someone who loves beauty and enjoys experimenting with your look, this post is for you. You’ll find a treasure trove of ideas that will inspire you to grab your nail polish and get started. From chic French tips with a modern twist to vibrant neon pops and calming watercolor swirls, I’ve curated 18 fabulous nail designs that you can do right in the comfort of your own home. Get ready to impress your friends and maybe even spark some envy—especially with the eye-catching design at #7!
You’ll gain not just inspiration but also simple, step-by-step guidance on how to execute each design yourself. Each nail art idea comes with tips that make it easy for beginners and experienced DIYers alike. So, grab your supplies, roll up your sleeves, and let’s dive into the world of trendy nail designs!
Key Takeaways
– You can create beautiful nail designs at home with simple techniques and supplies.
– This post includes 18 trendy styles, making it easy to find inspiration for any occasion.
– Each design is crafted to be beginner-friendly, so anyone can join in on the fun.
– You’ll discover unique twists on classic styles that can impress your friends.
– Following this guide will help you unleash your creativity and personalize your look.
1. Chic French Tip with a Twist

Looking to refresh the classic French tip? Add a splash of color or a hint of sparkle for a unique twist. Imagine vibrant shades like electric blue or lush emerald in place of the standard white tips. You can even incorporate a glitter gradient for added glam, making it suitable for both casual outings and special events.
Begin by prepping your nails with a trim and buff for a smooth finish. Apply a protective base coat, then paint your nails in a soft nude or pastel shade. Using tape, create clean tips with your chosen vibrant color, and finish with a glossy top coat for that perfect shine. With a bit of practice, you’ll master this stylish upgrade to a beloved classic!
Chic French Tip with a Twist
Editor’s Choice





📹 Related Video: French Twist Tutorial
2. Watercolor Swirls

Transform your nails into a dreamy canvas with watercolor swirls that scream artistic flair. This technique mimics the captivating blend of colors found in watercolor art, adding an effortlessly chic vibe to your look. Opt for harmonious shades like lavender, soft pink, and mint for a stunning effect.
Start with a base coat and allow it to dry completely. Using a nail sponge, apply your selected colors in a swirling motion, allowing them to blend beautifully on each nail. Add a touch of clear glitter polish for extra sparkle, then seal your masterpiece with a top coat for a smooth finish. This fun design is ideal for anyone who wants to showcase their vibrant, creative side.
Watercolor Swirls
Editor’s Choice


3. Minimalist Geometric Shapes

Minimalist geometric shapes on your nails make a bold statement while keeping things sleek and modern. Think sharp lines, triangles, or squares in contrasting hues against a neutral base for an eye-catching effect. This design is perfect if you appreciate simplicity with a twist.
Start with a clear or nude base coat to keep it clean. Use striping tape to outline the shapes you want on your nails, then fill them in with colors of your choice using a small brush. Remove the tape carefully before the polish dries for crisp lines, and finish with a top coat for that polished look. Customize this design with any palette that reflects your personal style!
💅 Nail Art Made Easy!
Transform your nail game with expert tips and stress-free techniques designed for busy new moms.
4. Floral Accents

Infuse your nails with the beauty of nature through delicate floral accents. Perfect for the warmer months, this design brings a fresh, vibrant feel to your fingertips. You can paint tiny blossoms on one nail or create a full floral display across multiple nails.
Start with a pastel base coat of your choice. Using a fine brush or dotting tool, create small flowers in various colors and add leaves or dots for that extra touch. Seal your design with a top coat to enhance durability. This flexible design allows you to pick your favorite flowers and colors to match your mood or outfit perfectly!
5. Ombre Delight

Ombre nails are a stunning way to blend your favorite shades into a seamless gradient. This design can incorporate two or more colors that transition smoothly, making it versatile for any occasion. Whether you prefer light-to-dark or dark-to-light, ombre can be personalized with any color palette you love.
Begin with a dry base coat, then select your shades. Apply them to a makeup sponge and dab it onto your nail, repeating until you achieve the intensity you desire. Seal your gradient with a top coat for a flawless finish. The striking yet simple nature of ombre nails makes them a go-to favorite for nail art lovers!
6. Neon Pop

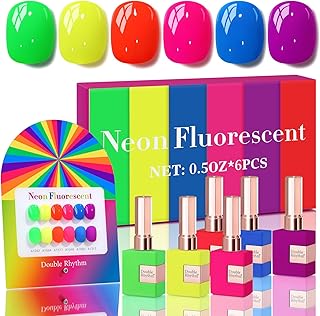
Want to make a bold statement? Neon colors are the way to go! Whether you opt for a full neon set or just accent your nails, this design is sure to turn heads. Pair vibrant neon hues with minimalist patterns for a trendy, standout look.
Start by applying a base coat to protect your nails. Choose your neon colors and either apply them in solid coats or sponge them for a blended effect. Add fun designs like stripes, dots, or lightning bolts to enhance the neon vibe, and finish with a top coat for a glossy look. This electrifying style is perfect for parties or any time you want to shine!
Neon Pop
Editor’s Choice


7. Textured Nail Art

Want to add some dimension to your nails? Textured nail art allows for a stunning combination of finishes, such as glitter, matte, or even 3D embellishments. This trend invites you to play with various textures for a unique and eye-catching result.
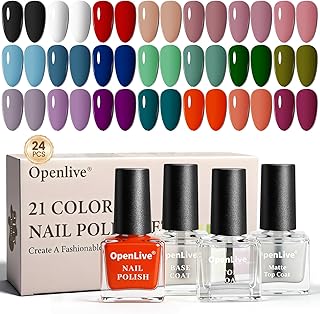
Start with a base coat, then apply a matte polish as your main color. Use a dotting tool to add glitter in random spots for a textured look. Consider incorporating rhinestones or nail gems for an added dimension. Finish with a top coat to bind everything together. This design is a fun way to showcase your creativity, and your friends will be amazed at your skills!
Textured Nail Art
Editor’s Choice



8. Retro Checkerboard

Channel your inner nostalgia with a playful checkerboard pattern on your nails. Whether you stick to classic black-and-white or mix up the colors for a unique twist, this design is fun and bold. It’s perfect for those who love to express their creativity.
Apply a base coat and let it dry thoroughly. Use tape to outline squares on your nails, filling them in with your chosen colors. Remove the tape while the polish is still wet for sharp, clean lines, and finish with a top coat to seal your design. This retro pattern is a fantastic way to showcase your artistic side!
You might also like


How To Choose the Right Nail Designs
Choosing the perfect nail design can be a fun yet overwhelming task, especially with so many trendy options available. Here are some key points to consider that will help you select the right nail designs for your next DIY manicure.
1. Consider Your Occasion
Think about where you’ll be showing off your nails. Are you going to a wedding, a casual outing, or a professional setting? For formal events, you might prefer classic styles like a chic French tip. For casual meet-ups, feel free to experiment with funky designs like neon pops or animal prints.
2. Choose Your Color Palette
Colors play a huge role in nail design. Decide if you want bold and bright or soft and subtle. Consider seasonal colors too! For example, pastel shades work well in spring, while deep, rich colors are perfect for fall. You can mix and match colors for a more personalized look.
3. Assess Your Skill Level
Some nail designs, like minimalist geometric shapes, are easier to achieve than others, such as textured nail art. If you’re just starting, pick simpler designs that require fewer tools and techniques. As you gain confidence, you can move on to more intricate styles.
4. Gather the Right Tools
Having the right tools makes all the difference! Basic supplies include nail polish, a base and top coat, nail art brushes, and dotting tools. If you’re trying a more complex design, look for specialty tools like striping tape or sponges for ombre effects.
5. Plan for Maintenance
Consider how long you want your nail design to last. Some styles require more upkeep than others. Glitter fades and ombre designs may chip quickly, requiring more frequent touch-ups. On the other hand, a classic red can last longer with fewer touch-ups.
6. Look for Inspiration
Sometimes, all you need is a little inspiration! Browse social media platforms or nail art blogs for trendy designs that catch your eye. You can recreate an entire look or blend elements from multiple designs to create something uniquely yours.
Pro Tip: Before committing to a design, test it out on a nail wheel or practice on a few fake nails. This way, you can perfect your technique without risking your natural nails!
By following these tips, you can confidently choose nail designs that not only match your style but also make your friends envious. Happy nail painting!
9. Cosmic Vibes

Bring the wonders of the universe to your nails with stunning cosmic designs! Think starry patterns, nebula gradients, and shimmering galaxies. This design is perfect for anyone who dreams of the night sky and wants to incorporate that magic into their look.
Start with a dark polish as your base. Use a sponge to add lighter shades, creating a galaxy-like gradient effect. Add tiny stars with a dotting tool and white polish or use nail gems for extra sparkle. Seal it all with a glossy top coat. This enchanting design is sure to impress and spark conversations among your friends!
Cosmic Vibes
Editor’s Choice


10. Metallic Shine

Metallic nails are all the rage, adding a futuristic touch to your look. Whether you choose a full metallic finish or just highlight certain areas, this design shines beautifully for any occasion. Gold, silver, or rose gold polishes can make your nails truly stand out.
Start with a base coat for smooth application. Apply two coats of your chosen metallic polish, and consider adding nail tape to create stripes or patterns in contrasting colors. Finish with a top coat for extra shine and protection. This bold look is sure to make you feel like a star!
11. Classic Red with a Twist

You can never go wrong with classic red nails, but why not give it a fresh twist? Combine a glossy red base with matte tips or fun accents like polka dots or stripes. This keeps the timeless appeal of red while adding a modern flair.
Start with a base coat and follow up with two coats of vibrant red polish. Use a matte top coat on the tips or to create playful designs. You can also use a dotting tool to add contrasting dots or lines for a chic finish. This design is versatile for any season and can be dressed up or down!
12. Tie-Dye Fun

Celebrate vibrant colors and playfulness with tie-dye nails! This design lets you express your personality through a mix of bright shades and fun patterns. You can create a unique tie-dye effect with any colors you love.
Start with a light or white base coat. Apply several drops of different colored polishes onto a makeup sponge, then press it onto your nail, gently dabbing to blend the colors. Seal with a top coat to protect your artwork. This whimsical design is perfect for summer or whenever you want to showcase your creativity!
Fun fact: 3-4 color tie-dye nails pop best on a white base. A quick dab with a makeup sponge blends the hues in seconds, finishing with a shiny top coat for a vibe that’s effortless and fun.
13. Animal Print

Unleash your wild side with fun animal print nail art! This trendy look can feature classic prints like leopard or zebra, or you can get creative with your own unique twists. Use bold colors to make the prints pop even more.
Start with a neutral base coat. With a thin brush, paint your desired animal print patterns, and consider adding glitter polish for an eye-catching sparkle. Finish with a top coat to protect your design. Animal print nails are perfect for fashionistas looking to add a fierce touch to their style!
Fun fact: 68% of nail art fans say animal print nails instantly elevate an outfit. A bold leopard or zebra pattern adds instant attitude, even in a busy week. Start with a neutral base and layer with a thin brush for spots.
14. Dotted Designs

Dotted nail designs are a simple yet fun way to add flair to your manicure. With just a dotting tool and your favorite colors, you can create intricate patterns that are perfect for any occasion.
Start with a base color of your choice. Use a dotting tool to create dots in various sizes and colors across your nails. You can also mix in contrasting colors for added interest and create shapes or patterns with the dots. Seal it all with a top coat to ensure your design lasts. This technique is great for both beginners and seasoned nail artists!
You Might Also Like


15. Seasonal Themes

Celebrate the beauty of each season with themed nail designs that reflect the colors and feelings of that time of year. Fall could bring warm tones and leaves, while summer might showcase bright colors and beach themes. Changing your nails with the seasons keeps your style fresh and exciting.
Choose a color palette that represents the season and incorporate elements like leaves for autumn or snowflakes for winter. Use a mix of techniques, such as painting, stamping, or stickers, to achieve your desired look. Seal with a top coat to finish. Seasonal nail art is a fun way to express your creativity and stay trendy all year round!
16. Glitter Fade

Glitter fades are a fabulous way to add sparkle to your nails! This design transitions from a full glittery look at the tips to a more subtle shimmer at the base. It’s perfect for parties or celebrations, adding a festive touch.
Start with a base coat of your chosen color. Apply a generous amount of glitter polish at the tips and gradually thin it out towards the base for a smooth blend. Finish with a top coat to seal your design. This look is perfect for glitter lovers and can be customized with different colors!
17. Color Blocked Nails

Color blocking is a fun technique that uses bold, contrasting colors to create striking designs. This playful and modern look allows you to express your style by mixing different colors and patterns. You can block out the entire nail or just create sections for a more intricate effect.
Start with a solid base coat. Use tape to section off parts of your nails and paint them with your chosen colors. Make sure each section dries before removing the tape for clean lines. Seal with a top coat for a polished finish. Color-blocked nails are perfect for those who love to experiment with their style!
18. Abstract Nail Art

Let your imagination run wild with abstract nail art! This design gives you the freedom to mix colors, shapes, and patterns in creative ways. You can explore different techniques, making each nail a unique canvas for your artistic expression.
Start with a base coat of your choice. Use brushes to create strokes, shapes, or splotches of color on your nails. Mix colors and try techniques like splatter or marbling for added texture. Seal your masterpiece with a top coat to protect your artwork. This design is perfect for showcasing your artistic side and can be tailored to reflect your personal style!
Fun fact: Abstract nail art thrives on simple tools—3 brushes, 2 splatters, and 1 clean base coat can create bold nail designs. Mix colors freely, seal with a top coat, and let your nails tell your art story.
Conclusion

Whether you prefer the simplicity of a classic look or the creativity of abstract designs, these 18 trendy nail designs offer something for everyone.
Don’t be afraid to mix and match techniques, colors, and styles to create your perfect at-home manicure. Your nails are a canvas, so have fun expressing your personality and wow your friends with your newfound nail art skills.
Happy painting!
Note: We aim to provide accurate product links, but some may occasionally expire or become unavailable. If this happens, please search directly on Amazon for the product or a suitable alternative.
This post contains Amazon affiliate links, meaning we may earn a small commission if you purchase through our links, at no extra cost to you.
Frequently Asked Questions
What are the easiest nail designs from this article to try at home?
Want a quick win? Start with easy, high-impact nail designs you’ll find in the article: minimalist lines, simple dots, or a chic gradient. To DIY at home: prep nails, push back cuticles, buff surface, apply a base coat, then build the design with a thin brush or a dotting tool. Use striping tape for clean lines, peel away carefully, and seal with a glossy top coat.
These nail designs look trendy without fuss, making them perfect for beginners who want a stylish DIY project.
How can I recreate the #7 trendy nail design at home without pro tools?
Recreating the #7 design is totally doable with common tools. Start with a clean base, paint your chosen color, then use striping tape to lay out the pattern. If you don’t have a striping brush, a thin brush or even a rolled piece of tape can work for lines; for dots, a simple dotting tool or the end of a bobby pin does the trick. Finish with a top coat for shine and longevity.
Pro tip: keep layers thin and let each layer dry to keep the look crisp and trendy.
What supplies do I need for DIY trendy nail designs?
Here’s a quick at-home toolkit: base coat, colored nail polish, and a top coat for longevity; a few nail-art basics like a striping tape, a dotting tool (or a toothpick), a small flat brush for clean edges, and cotton pads with nail polish remover for touch-ups.
Also handy: a quick-dry top coat, cuticle oil, and a clean workspace to keep your nail designs fresh and neat.
How can I make my at-home nail designs last longer?
Long-lasting nail designs come down to technique and protection. Apply 1–2 thin coats instead of one thick layer, allow adequate drying time between coats, and finish with a durable top coat. Reapply a top coat every couple of days, avoid hot water for 24–48 hours after painting, and keep nails moisturized with cuticle oil to prevent chipping and dryness. This keeps your nail designs looking fresh longer.
Are these nail designs suitable for beginners and for different nail shapes?
Absolutely. The designs in the article are beginner-friendly and scalable to different nail shapes—square, round, almond, or stiletto. Start with simpler patterns on shorter nails, and as you gain confidence, scale up the complexity. Use a light base color to let patterns pop, and adjust the size of details to match nail width. With the right base and top coats, your nail designs will look polished on any shape.
Related Topics
nail designs
trendy nail art
DIY nail designs
beginner friendly
easy nail art
minimalist nail design
seasonal nail trends
quick nail ideas
colorful nail patterns
home manicure
nail art techniques
gel polish designs


